
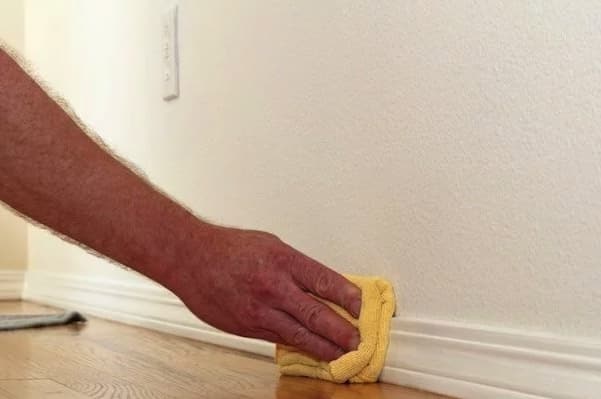
Baseboards take a beating. Vacuum hits, spills, and foot traffic all leave marks. But the real damage starts when you try to clean them. Many common cleaning methods cause permanent gouges, paint loss, and finish damage that cost hundreds to repair. Understanding which mistakes damage your trim helps you avoid expensive replacement costs. Poor baseboard care compounds other home damage issues, from furniture placement mistakes that destroy floors to pet damage that spreads beyond visible areas.
The sections below show seven cleaning mistakes that damage baseboard molding, with repair costs for each.
1. Scrubbing With Abrasive Sponges Gouges Paint
Abrasive sponges and scouring pads scratch baseboard paint and expose bare wood underneath. When you apply pressure with a rough textured sponge, the protective finish layer is removed, creating visible scratches that collect dust and make the baseboard look worn even after you just cleaned it.
Once the paint is gouged, moisture seeps in, the wood swells, and the paint cracks further. A single deep scratch can turn into a soft spot that splinters. Replacing the damaged section or repainting an entire room costs $300 to $800 in labor.
Use soft cloths or microfiber pads instead. Apply dish soap and water to a soft sponge and work gently, testing on a hidden corner first. See faster cleaning methods that protect your surfaces while saving time.
2. Using Bleach on White Trim Causes Yellowing
Bleach yellows white and cream baseboards permanently. When bleach contacts painted wood, a chemical reaction occurs that turns the paint a dull yellow or tan shade. This discoloration spreads unevenly, creating dark streaks and patches that look worse than the original dirt marks you were trying to remove.
Once bleach yellows your trim, the only fix is to repaint. Touch-up paint costs $25 to $50, while professional repainting runs $300 to $800 per room. The damage is irreversible once dry. Clean white baseboards with water and a few drops of dish soap instead. For stubborn stains, try a pencil eraser or equal parts water and white vinegar on non-stained wood only. For persistent yellowing issues, check why paint colors fade and cost more to fix.
3. Magic Erasers Remove Paint Finish
Mr Clean Magic Erasers are melamine foam that abrade surfaces through mechanical action. They work by sanding away the top layer of whatever they touch. When used on satin or semi-gloss baseboards, they scrub away the protective coating, leaving a dull, matte finish patch. Your baseboard now looks uneven and worn.
Continuing to use the eraser sands through paint entirely into bare wood. Fixing this requires sanding the entire baseboard and repainting or replacing the section. Full baseboard replacement costs $3 to $5 per linear foot plus paint, or $200 to $400 for a 20-foot room in materials alone.
Use soft cloths, baby wipes, or Murphy Oil Soap diluted in water instead. Wipe in the direction of the wood grain. Call a professional for stubborn marks rather than risk further damage to the finish.
4. Vacuum Attachments Scratch and Chip Corners
Hard plastic vacuum attachments gouge paint and chip baseboard corners. When you angle the brush head or hose down to suck dust from the baseboard-floor junction, the hard plastic edge bumps against the trim. Repeated bumping creates white scratches where the paint is removed, and corners take the brunt of the impact since they stick out further than flat surfaces.
Chipped corners look damaged immediately and are the first place moisture enters the wood. A single chip can allow water from spills to seep in, leading to soft wood that attracts carpenter ants. One section costs $50 to $150 for materials, while widespread damage requires replacing entire baseboards at $200 to $600 per room.
Keep the vacuum brush several inches away from baseboards. Use a hand-held vacuum with a soft attachment for tight spaces, or use a broom and dustpan instead. See simple repair hacks to fix damage before it spreads.
5. Vinegar on Stained Wood Raises Grain
Vinegar and water solutions work on many surfaces, but on stained wood baseboards they cause problems. The acidity of vinegar reacts with the wood stain and finish, raising the wood grain. This creates a rough, splintering surface that looks scratched and worn. The moisture also darkens the stain unevenly, creating dark streaks and blotches that make the trim look aged or water damaged.
Once the grain is raised, sanding is the only way to smooth the surface. This removes the stain entirely and requires you to restain and reseal the wood to match the original finish. A professional stain refinishing job costs $300 to $800 per room.
For stained wood, use only dry cloths for regular cleaning. Test Murphy Oil Soap diluted heavily in water on a hidden area first, then wipe gently and dry immediately. Never use vinegar, bleach, or water-heavy solutions on stained or varnished wood trim. Learn about what surfaces need the most cleaning care to prioritize your home maintenance.
6. Ignoring Caulk Gaps Leads to Pest Entry and Moisture
Small gaps between the baseboard and wall or baseboard and floor are common, but ignoring them causes expensive problems. Gaps let cold air draft in during winter and hot air in during summer. They also provide entry points for insects like ants, roaches, and carpenter ants that nest inside the wall cavities next to the baseboard.
Once pests enter behind the baseboard, they spread through the wall system causing structural damage. Moisture from spills and humidity also seeps through gaps, causing wood rot that weakens the trim. Pest treatment and wall repairs cost $500 to $2,000. Water damage repairs require drywall replacement and mold remediation.
Inspect baseboards for gaps, especially at corners and where baseboards meet walls. Caulk small gaps with paintable caulk or silicone sealant, depending on your baseboard material and finish. Re-caulk every few years as caulk shrinks and cracks over time. This costs less than $20 in materials and prevents thousands in damage. Review critical home maintenance issues often overlooked to prevent costly repairs.
7. Painting Over Chips Without Sanding Creates Peeling
When you paint over damaged areas without sanding first, the new paint does not bond properly to the existing finish. The paint sits on top of loose, flaking old paint and naturally peels off within weeks. This creates a cycle of painting, peeling, and repainting that wastes money and looks worse each time. Eventually, so much paint builds up that it cracks and flakes unpredictably.
Proper repair requires sanding the damaged area smooth, priming the exposed wood, and then painting. This takes time and material, but ensures the paint sticks and lasts. Professional repainting costs $300 to $800 per room. A sand and spot-prime job yourself costs $10 to $30 and prevents the larger expense.
Before painting, sand gently with 120-grit or 150-grit sandpaper, remove loose paint, wipe with a damp cloth, apply primer to bare wood, then paint with matching semi-gloss or satin paint. This process takes 30 minutes. Find quick cleaning tricks that keep baseboards looking fresh between deeper repairs.
What Actually Works: Protecting Baseboards the Right Way
Most baseboard damage happens during cleaning, not everyday use. These mistakes are preventable. Choose soft cleaning methods and address small problems quickly to avoid expensive repairs. Start with habit changes: switch to soft cloths, avoid harsh chemicals, and keep vacuums away from trim. For broader home cleaning strategies, see bathroom cleaning hacks and stain removal techniques that also apply to baseboard care.
When damage occurs, repair it immediately with light sanding and touch-up paint before it spreads. Compare touch-up paint costs ($25 to $50) against professional repainting ($300 to $800) and decide what fits your budget. Prevention first and timely repairs second keeps your maintenance costs under control while preserving your trim investment.
- 26shares
- Facebook5
- Twitter2
- Pinterest18